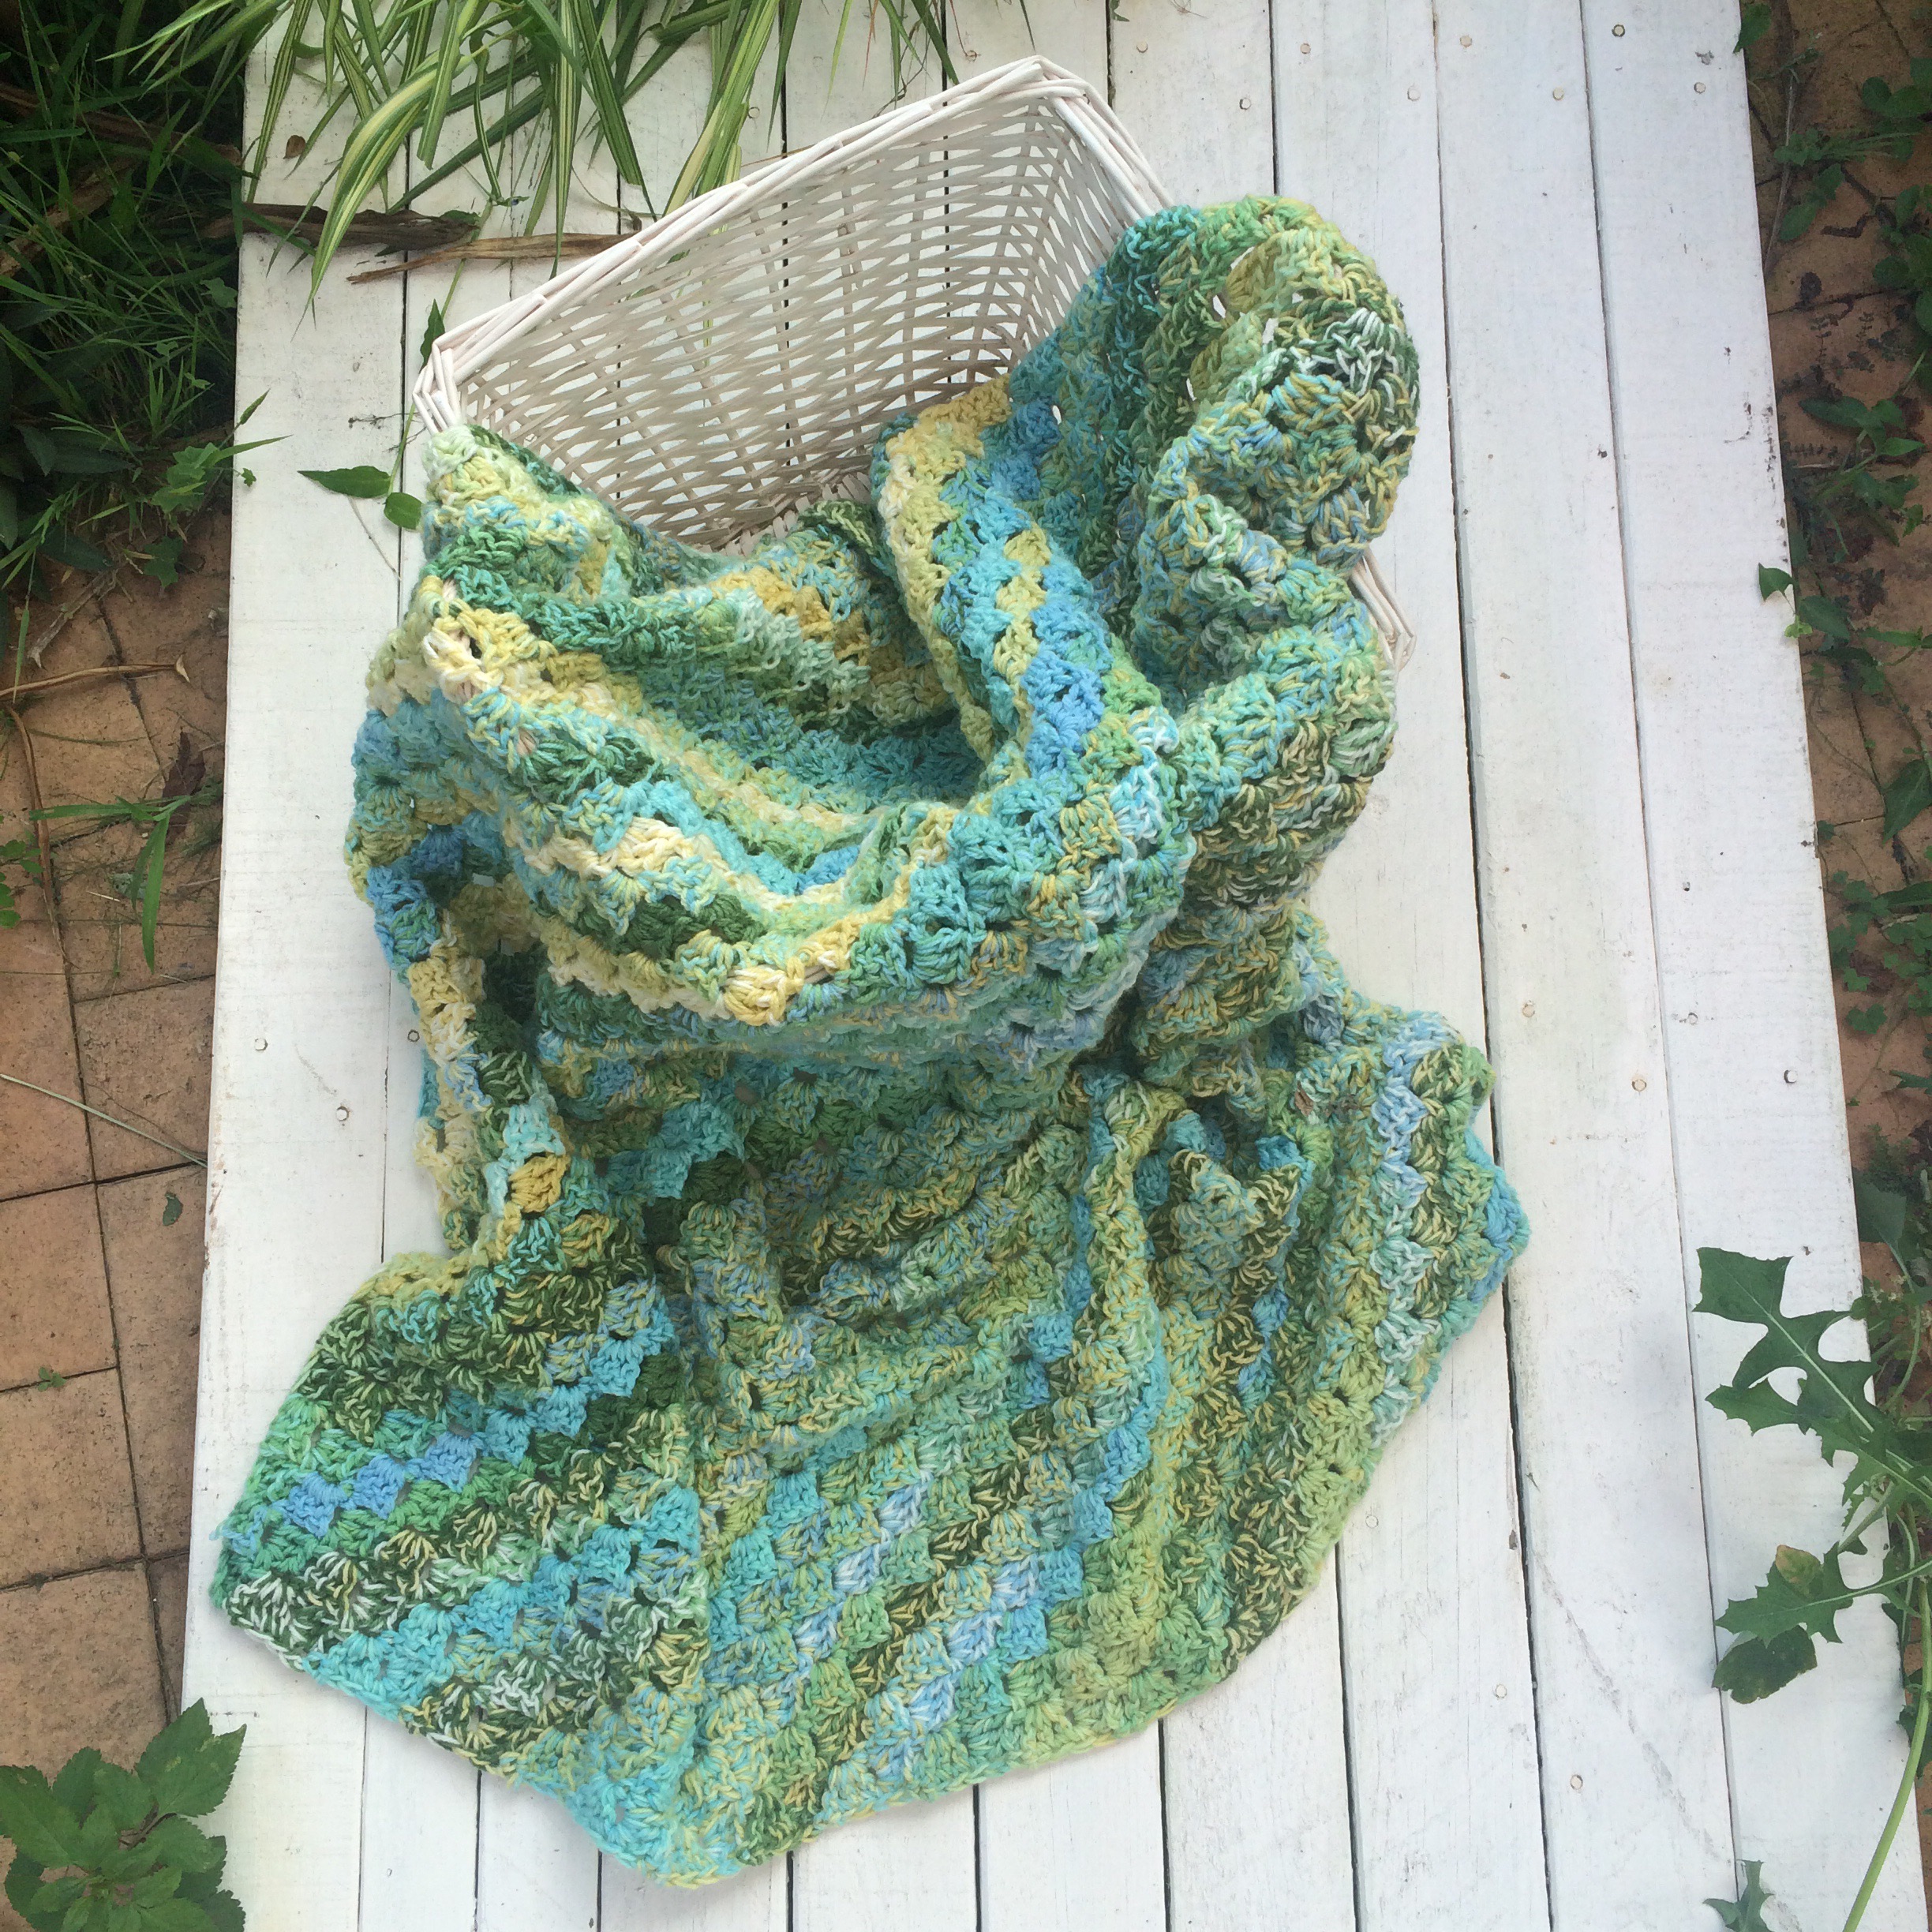
Ta Da! It’s finally finished! I may have taken on a few more projects than I should have to this got pushed towards the bottom of the pile. I love corner to corner blankets but they get the the middle point and start to slow right down. It’s frustrating because you feel like you are spending hours and getting no where. But oh well, it’s done. I powered through and finished!
To get this effect I used Ice Yarn Magic and held two stands of the yarn together. I also used a 9mm hook. This is a great way of making the wool thick and chunky and the larger hook means you finish earlier. This yarn was so deliciously soft and the whole blanket feels like a cloud. By holding the two strands together it created a unique effect with the colour changing yarn.
This blanket it for me to keep but it’ll be put away until the weather cools down a bit!

Oh wow, they are finally done. After weeks of procrastinating I finally finished both the blankets! I really didn’t like the yarn used on the more pinker blanket, it was too fine and not as soft as the other one. And somehow still have about 100gms of it left! Anyways, they are both done and are now awaiting the arrival of their precious new owners. I’m contemplating adding a border around them, especially the more gender neutral one, but will wait until the baby’s are born to make my final decision.
I emailed my aunty a photo of my rainbow blanket and she immediately loved it and requested one for herself. Her only change was the colours. Purples, greens, and browns were requested; a lot different to my usual style of bright and funky! So off to the internets to find something she would like. I came across this 100% wool yarn and knew straight away it was the right choice. I ordered 8 balls of it without realizing it wasn’t going to be enough- damn ordering 4 more balls and paying for international shipping again!
So once again I made this double stranded and corner to corner. The wool was so thick and warm. I probably should have used a bigger hook but I wanted to start straight away! I am currently half way there. Now I can only wait for the extra wool to arrive!

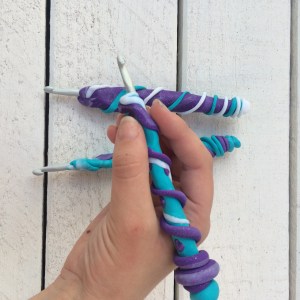
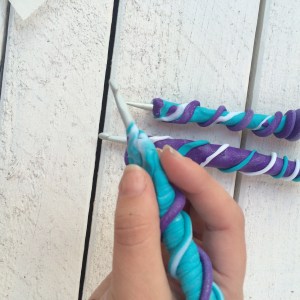
I’ve seen a lot of people using their custom crochet hooks and thought I’d give it a try. They’re really simple to make! The hardest part was deciding on colours!
You will need:
Metal Crochet Hook in your desired size
Polymer clay in your desired colours
Rolling pin
Baking tray and baking paper and oven
Simply roll your clay into a flat even rectangle. Get creative with colours and designs. Once you are happy with your designs preheat an oven. Please follow the directions on the packet for maximum temperatures. Put our baking paper on your tray and carefully place your hooks. I cooked mine for 7 minutes before turing them over and cooking for another 7 minutes. Be very careful as thy are boiling hot. Allow them to cool completely before touching with your bare hands. And you’re done! Enjoy your custom crocheting hook.
S
Here are a few projects I’m working on right now. So much planned for this year in terms of crochet. I usually don’t start one project until I’ve finished the current one, but I couldn’t resist with my new StyleCraft yarn turning up! 50 delicious balls in 25 colours! I should be able to make about 5 blankets out of all this yarn. I love how quick and inexpensive the shipping is considering it comes from England! My wool had traveled more than me!
Instagram @thatgirlwhocrochets