This gorgeous blanket is now finished! The yarn is amazingly soft and warm! I’m calling this my mermaid blanket because the colours remind me of a mermaid’s tail. I decided to made 4 triangles of 34 rows and crochet them together. The result is a funky wavy pre-made border! I love this yarn and pattern and cannot wait to make a matching blanket!
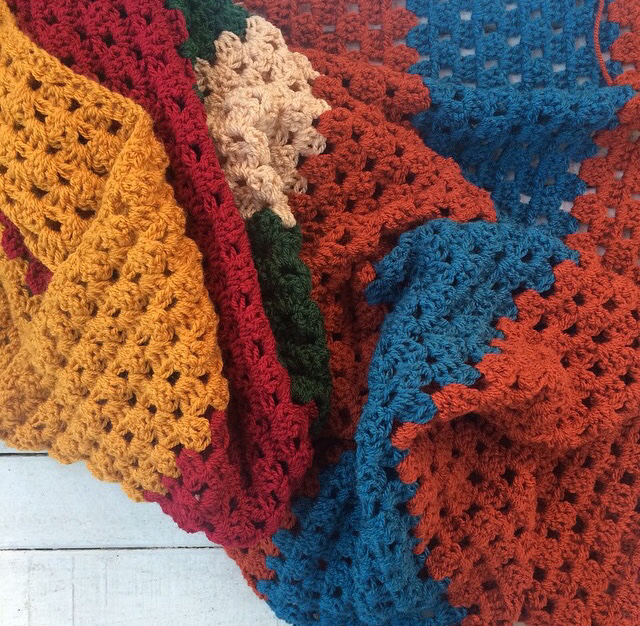
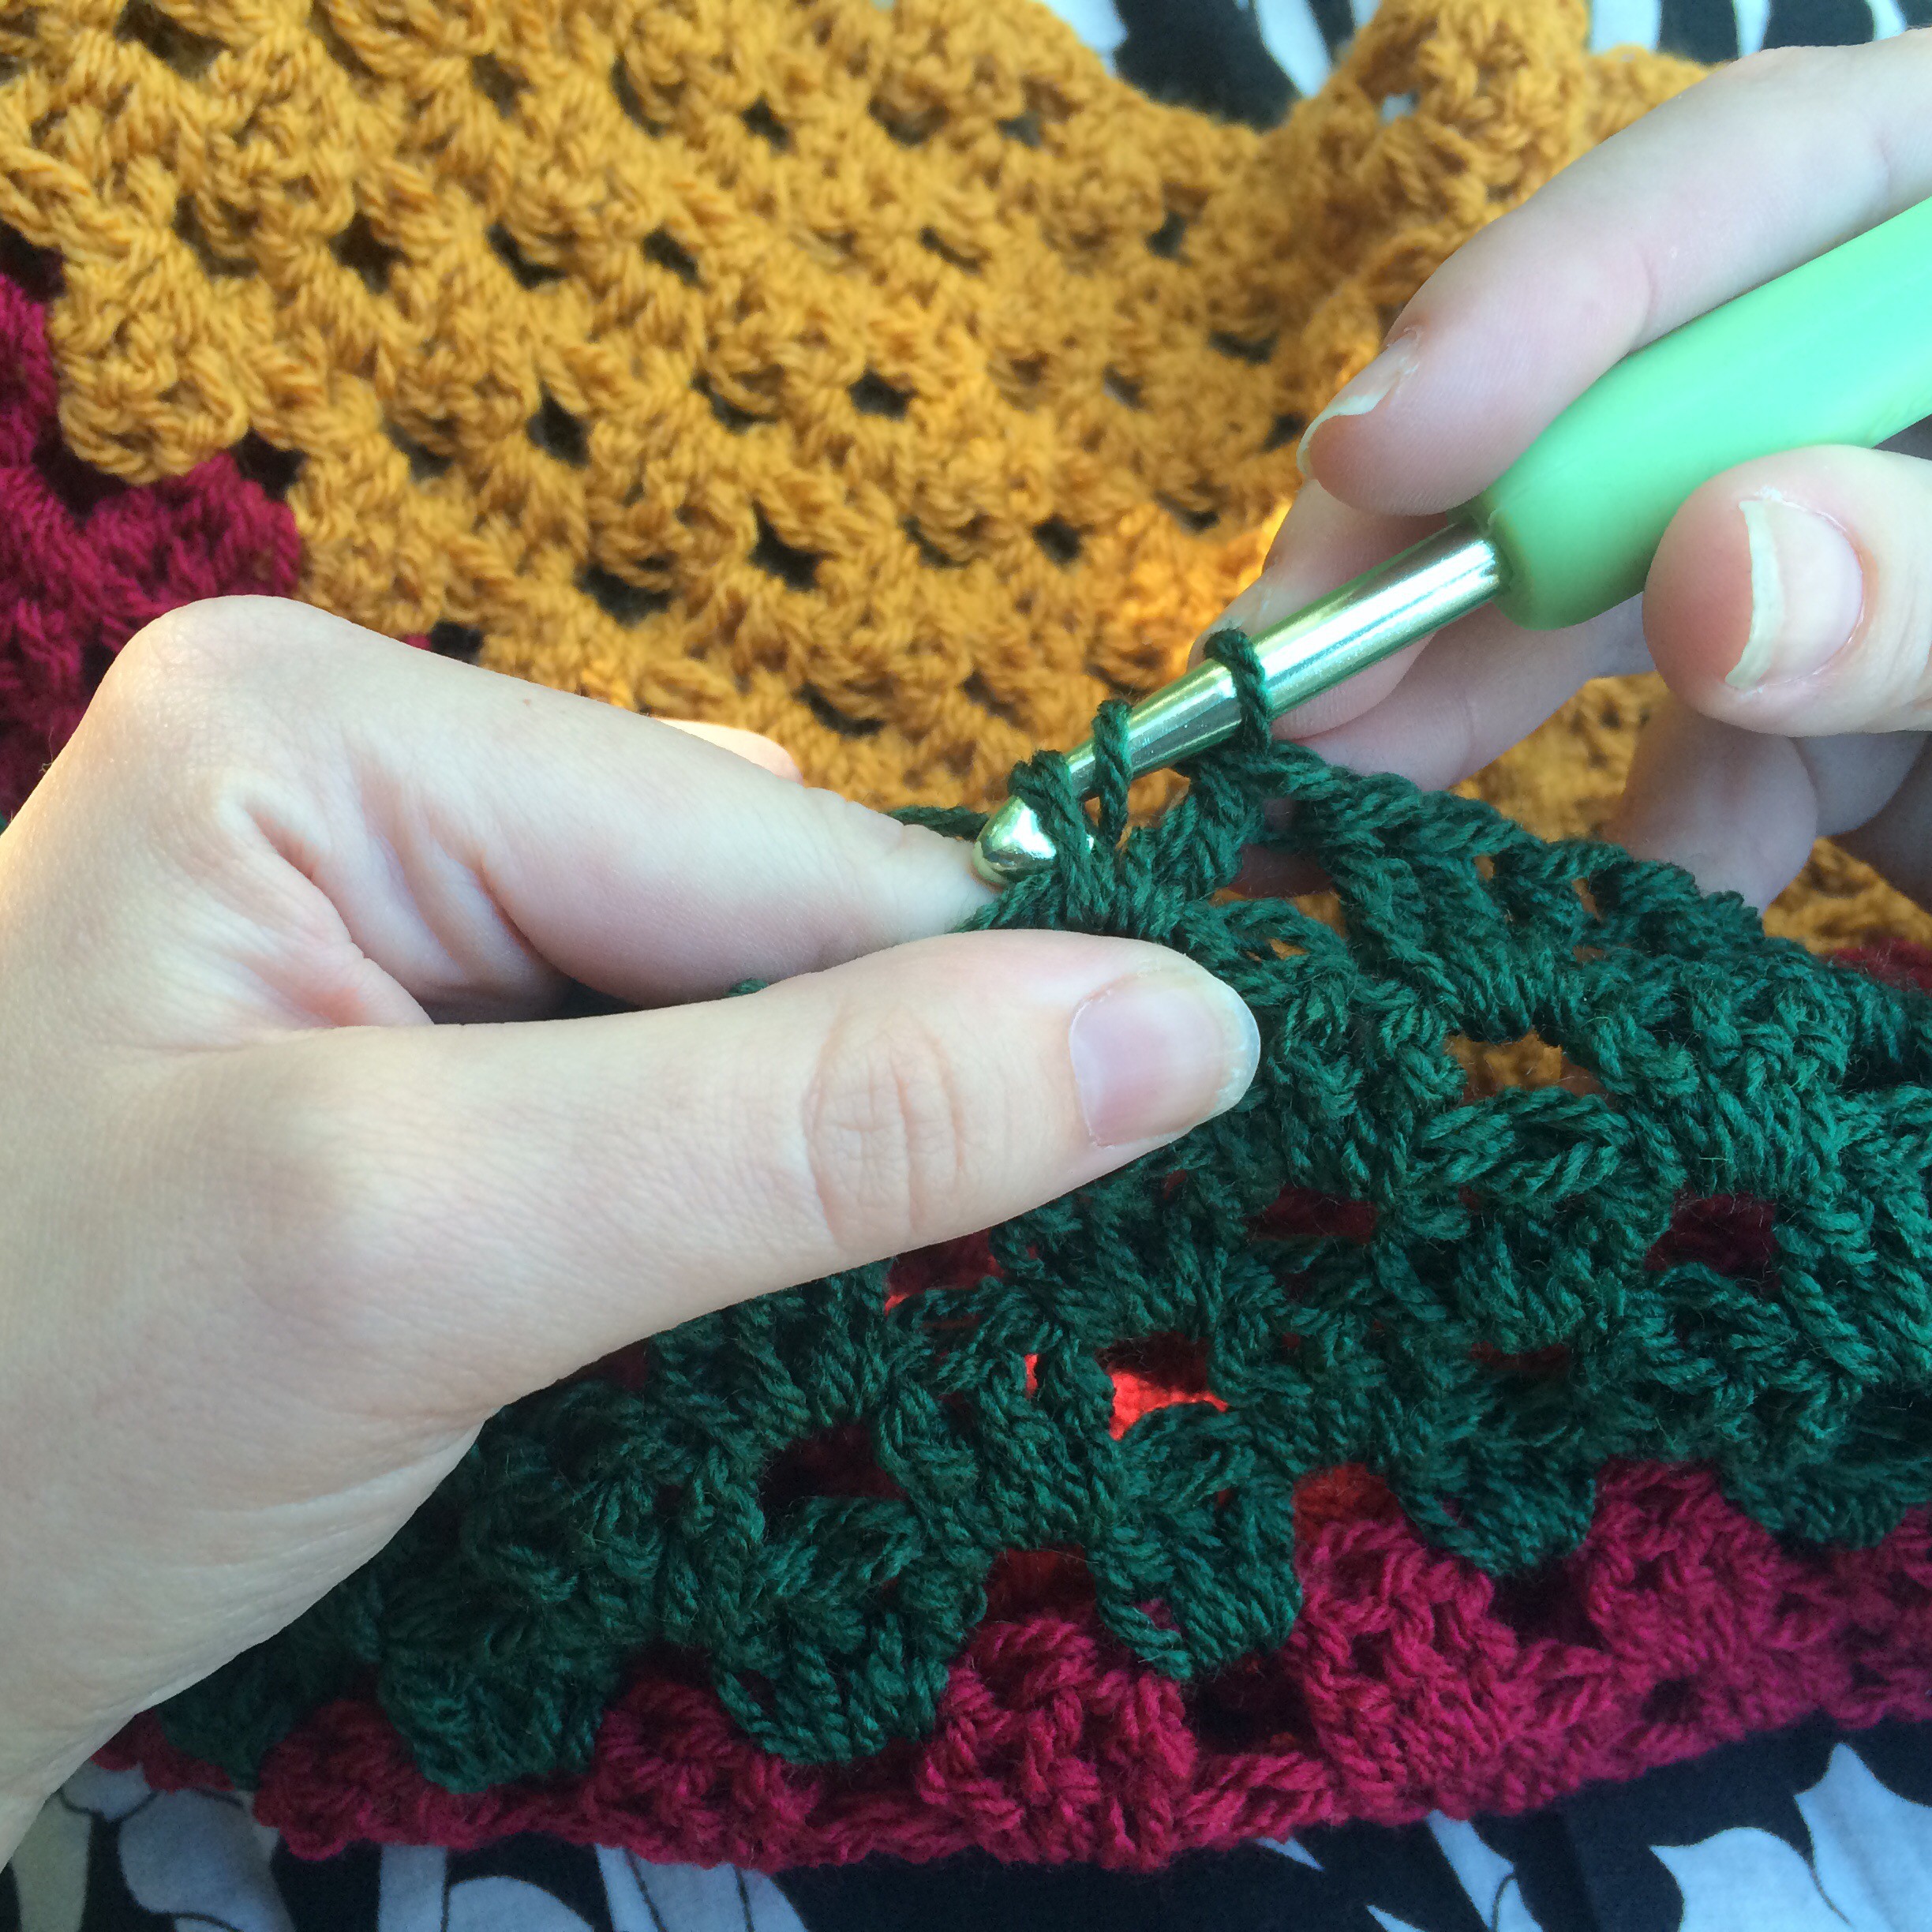
I finished this retro inspired blanket last week. Inspired by googling photos of those awesome crochet blankets I set out and brought some yarn. The burnt orange, mustard, deep maroon, cream, bottle green, and petrol blue really made this blanket come together! The pattern is a simple granny stripe which works up fast.
I used two balls of wool per colour, but only 1 for the blue. I’m not sure if I should add a border to this one or leave it. Possibly a grey or brown to keep the retro vibe alive. I haven’t had a granny blanket for a while, but I’ll be sure to make them in future!
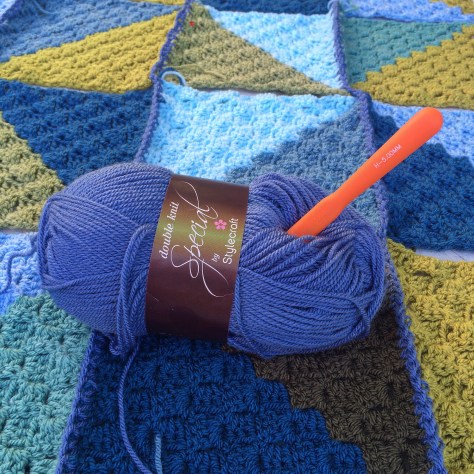
The thing that I love most about Stylecraft Special DK is the range of colour! So many awesome shades are available to satisfy every wolly idea. The yarn is super soft and very easy to work with. I have used about 15 balls of wool so far and have yet to come across any of those nasty joins you sometimes find.
This yarn is perfect for blankets, cushions, toys, and just about everything you can imagine. The price is super reasonable and it is a must for any crocheter!
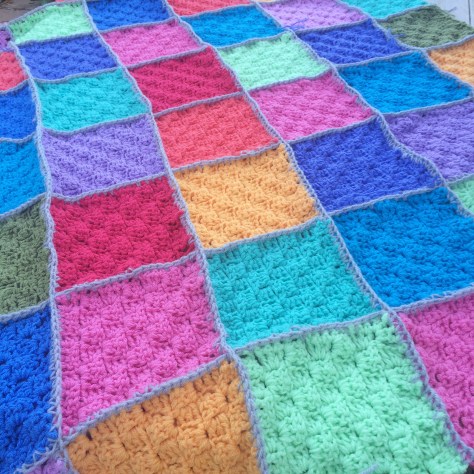
Finally this blanket is done! This took FOREVER! Each square is 7 rows x 7 rows and used double strands. Each colour made 4 squares. All up I used 12 balls of wool for this blanket. Crocheting them all together was slightly difficult only because of the size and weight of the blanket. I choose simple grey border to finish this blanket off which I think adds to the brightness!
I don’t think I’d make another one like this mainly due to the weight. This is yet another way you can modify the corner to corner pattern to make something unique!
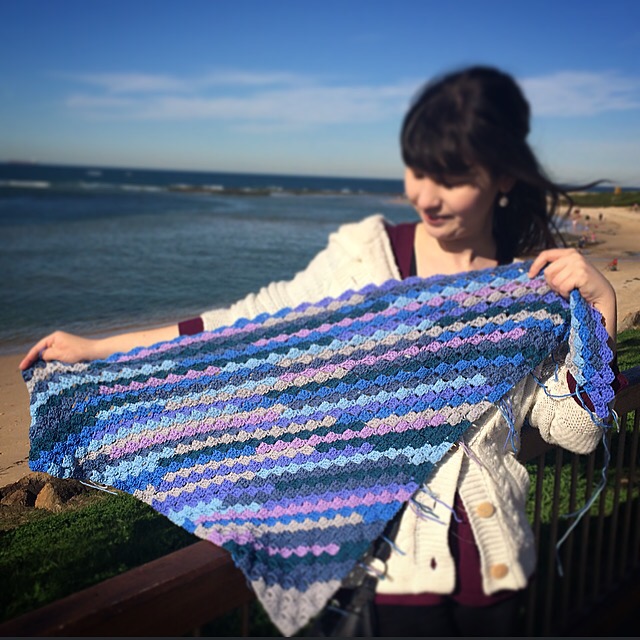
I’ve just come back from a long weekend away in Sydney. Naturally I took my crochet project with me! We covered a lot of the NSW wales area with trips to The Blue Mountain, The Entrance, Bondi Beach, and Brighton-Le-Sands.
The project I am working on is a simple corner to corner but with random colour changes. So I didn’t have to bring scissors on the plane I precut lengths of the yarn and took them with me. This was a great idea! I found crocheting in the car very relaxing and the flight took no time!
In Australia you can bring crochet hooks on planes but I didn’t want to risk my hook I purchased in America so brought a cheap plastic hook instead.
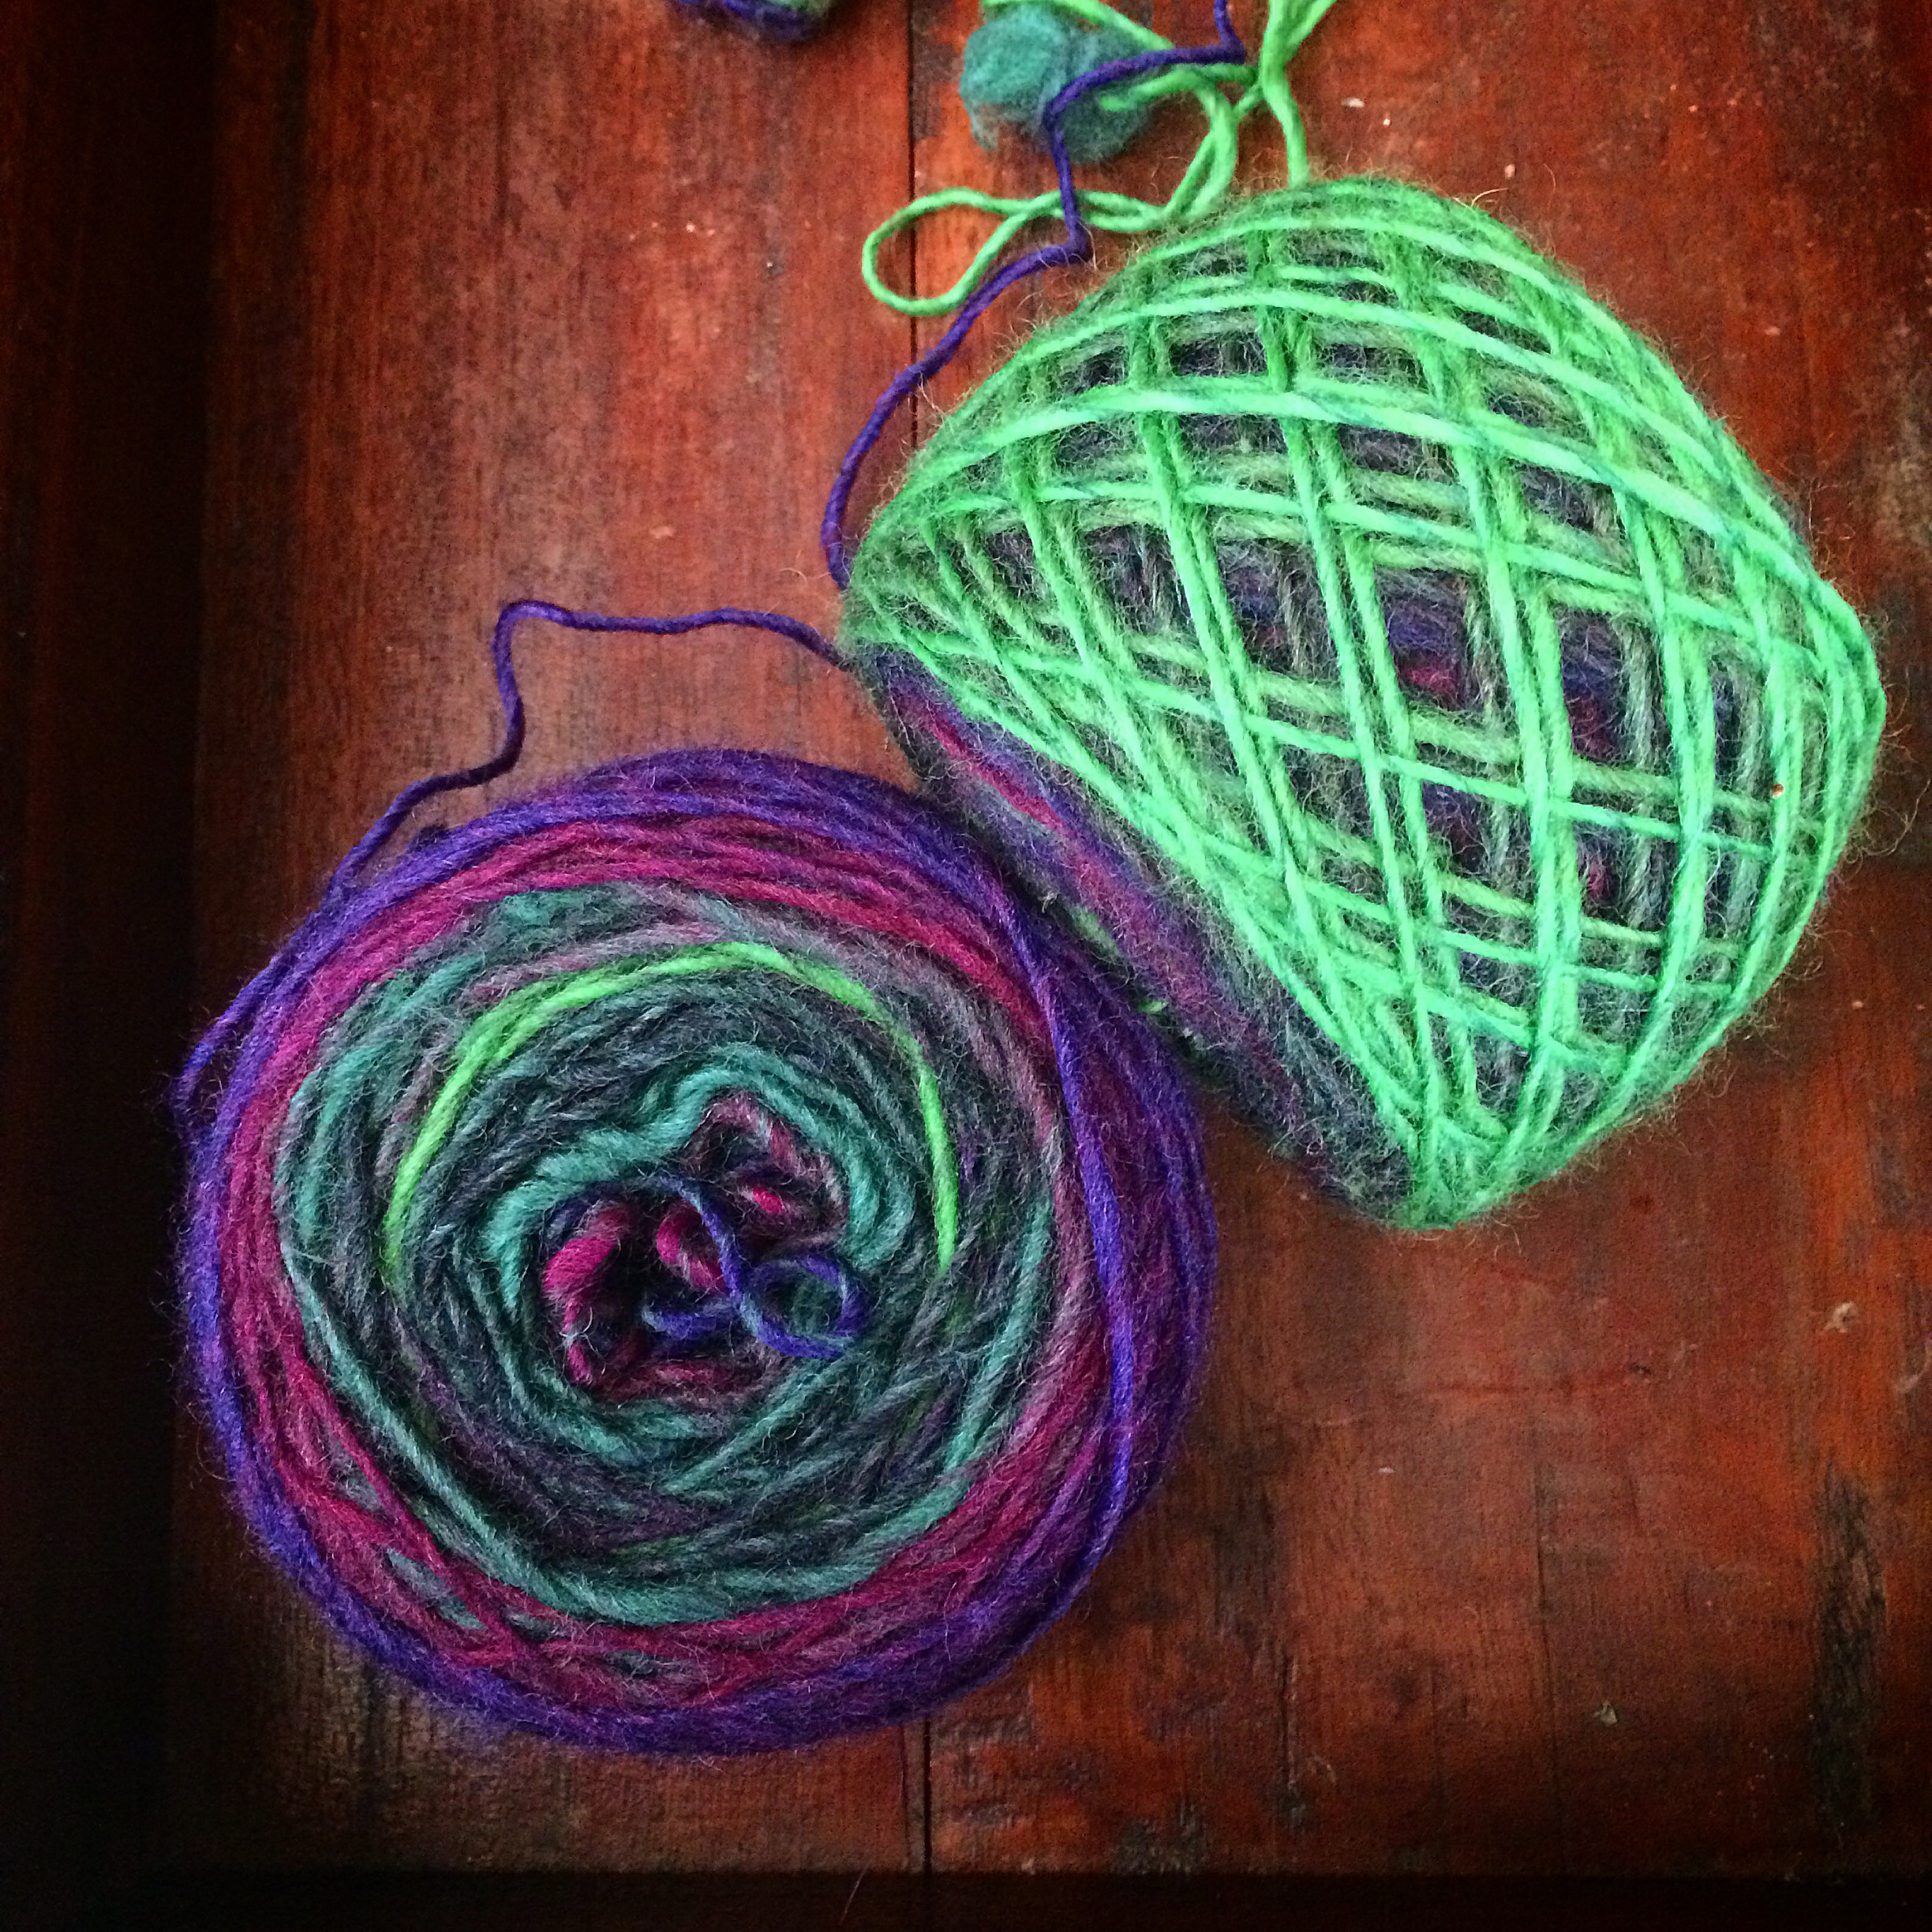
I came across this lovely wool when looking for a purple/green mix. It is aran weight so it’s quite thick and warm. I double stranded the yarn and used a 10mm hook to create a thick blanket. I needed 12 balls of wool to make a decent sized blanket due to the thickness of the yarn. The result was a warm, thick blanket.
This wool was fantastic to use, however slightly expensive for the amount of wool needed. I would use this again, but maybe not double strand the wool.
Inspired by the awesome retro blankets I’ve seen online recently I decided to make my own. I used Stylecraft yarn which comes in a great range of colours. For the retro feel I choose mustard, deep red, bottle green, an off cream, burnt orange, and a warm blue. Most of the retro blankets I’ve seen are granny squares which annoy me to pieces. After searching around I found a granny stripe pattern. This was great as it works from left to right and its very simple to understand. I’m doing 9 rows of each colour before repeating the pattern but in the opposite way. It’s coming together faster than I though and once you get past those tricky first three rows you almost don’t have to think.
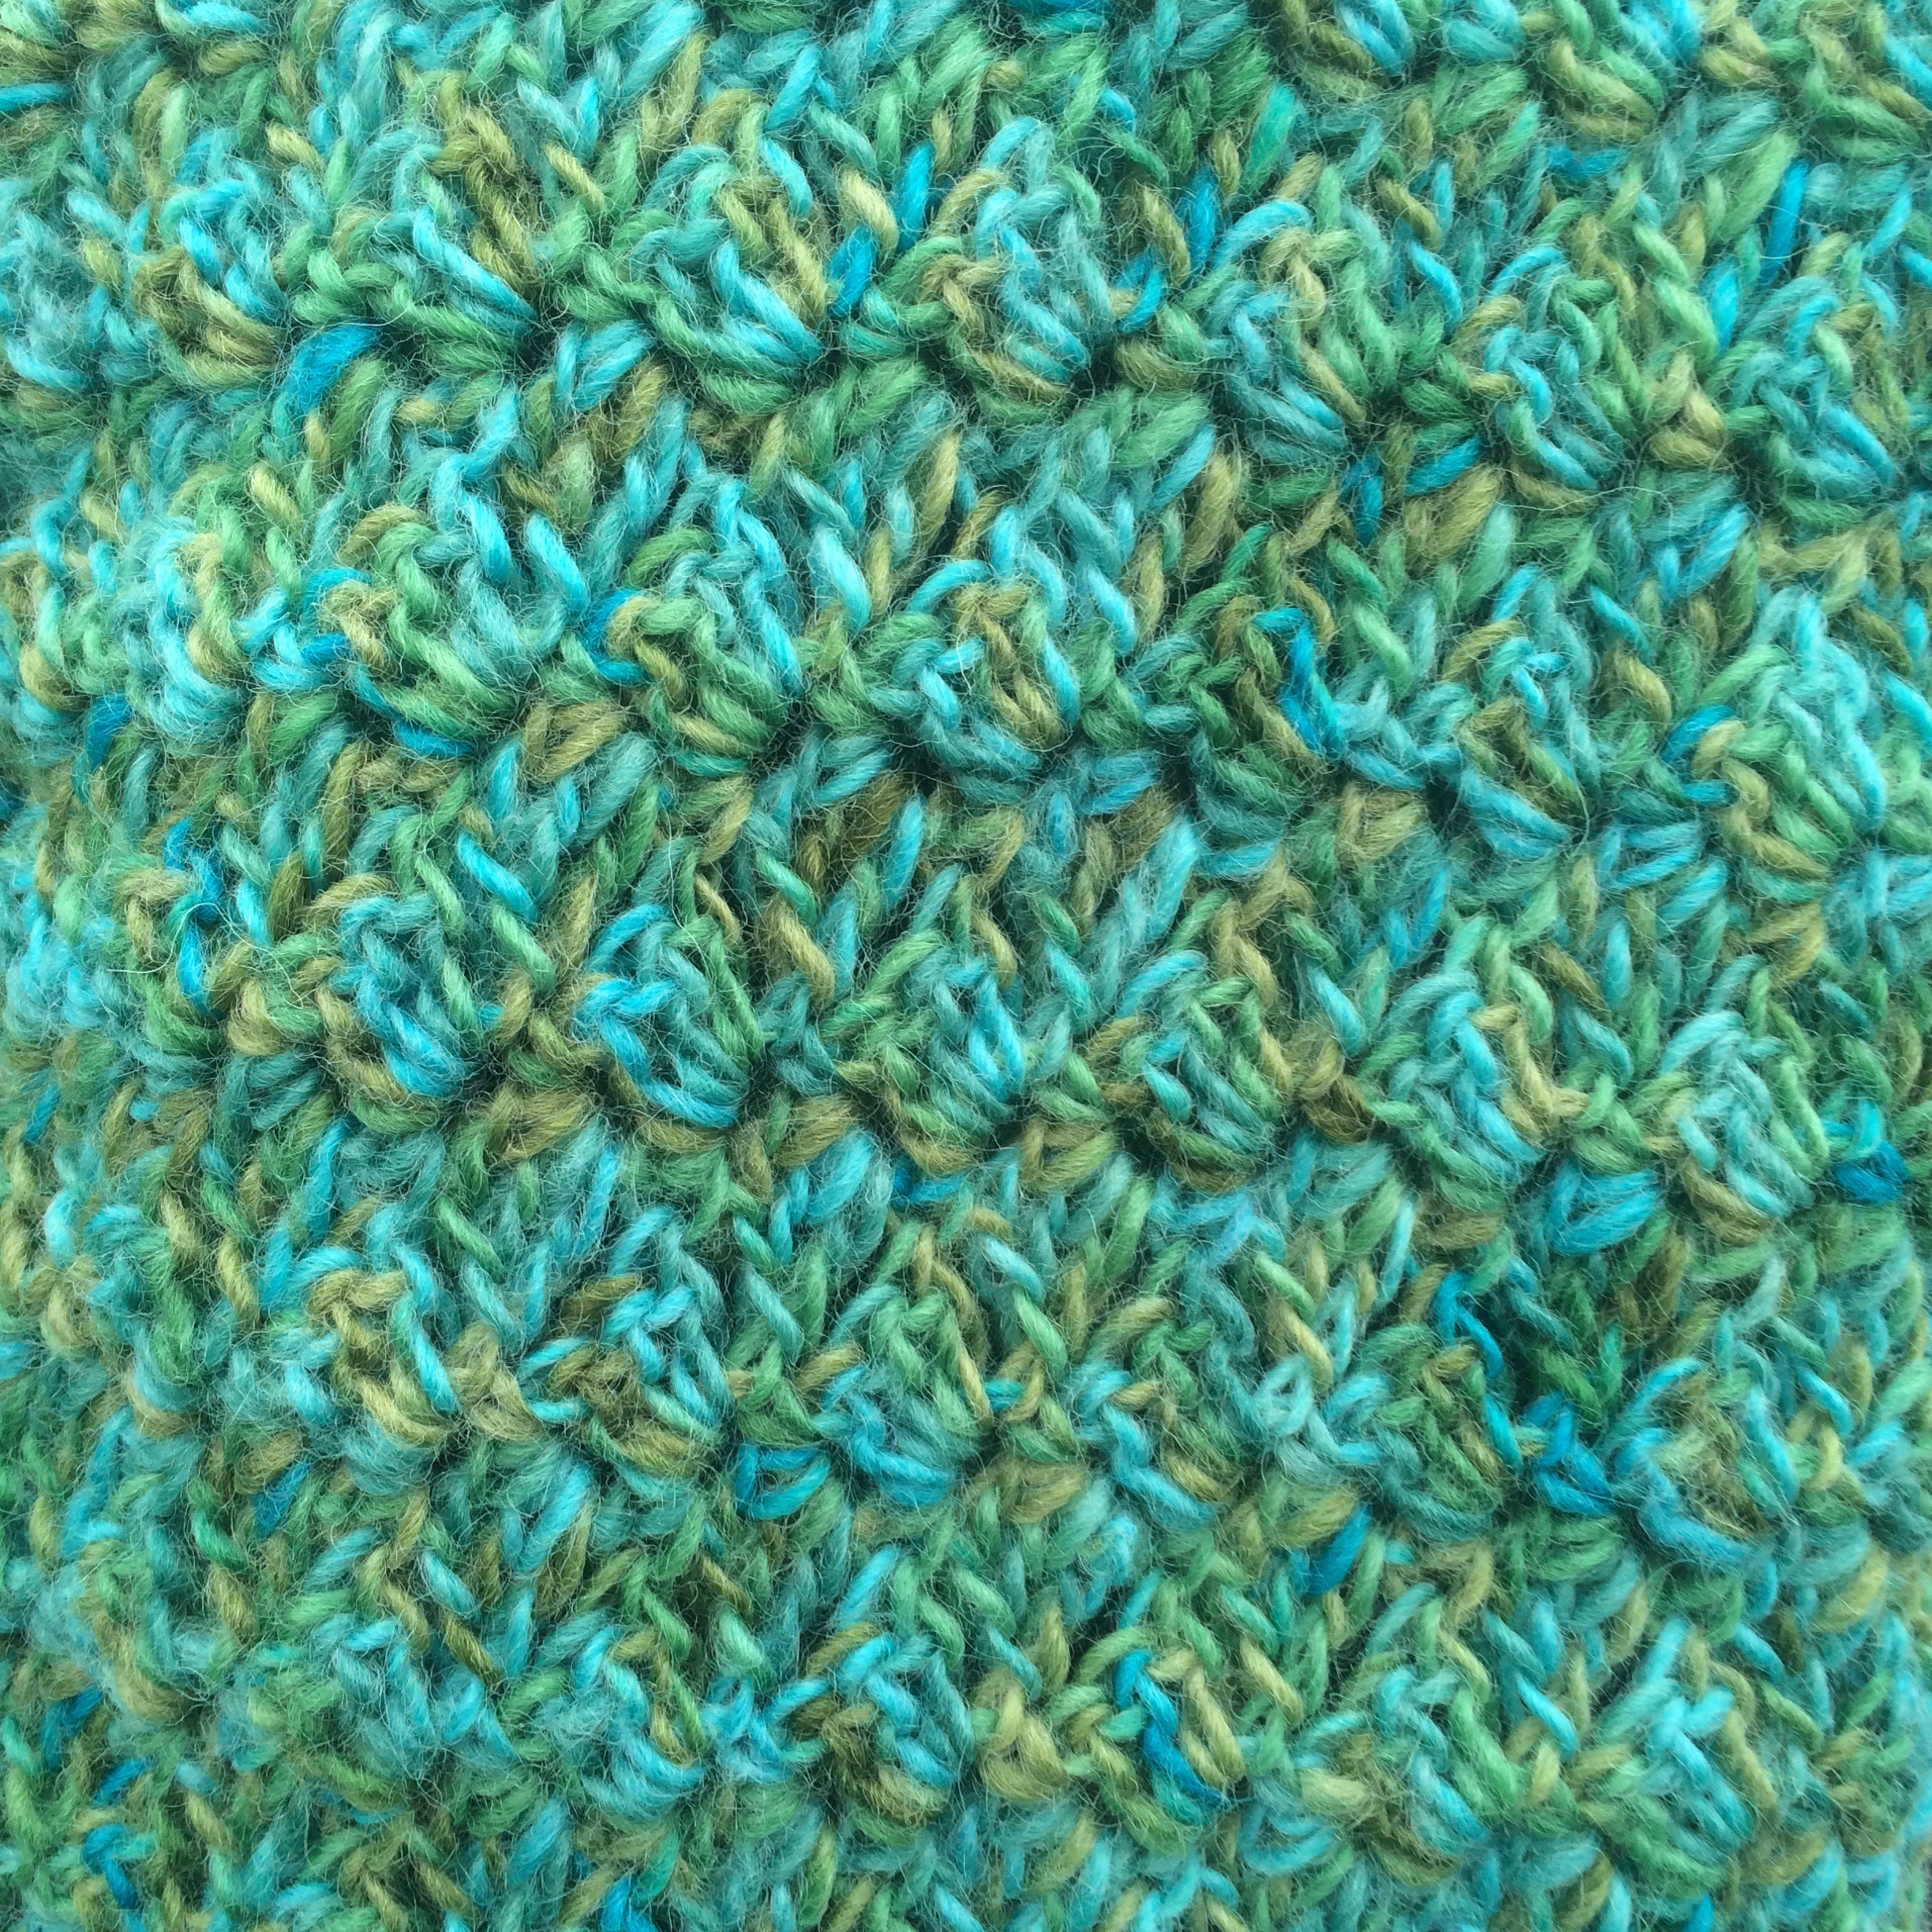
I found this awesome coloured yarn at Lincraft and instantly loved the tropical colours! It’s hard to find a mutli coloured yarn that isn’t blues, pinks, or rainbow. I decided to make a baby blanket which would be fun and practical. Pattern used is corner to corner and I went up 45 rows before decreasing. This blanket measures about 87 cm squared. To finish I single crochet into each hole to form a border.
I found this great wool at my local Kmart and loved the colours! What a perfect colour option for a baby blanket! I grabbed 4 balls of yarn and hurried home to start creating. The pattern is my usual corner to corner which looks amazing in the multi coloured wool. This blanket took about 24 hours of crochet over a week to complete. The baby blankets are super quick and easy to work with. To finish I single crochet into the edges to make a nice border. This blanket measures about 90x90cm and is great for a pram blanket.
I recently finished this gorgeous baby blanket. I kept it gender neutral and used cream with a light yellow trim. Patten is my usual corner to corner with a 6mm hook. The yarn is by Stylecraft and is called cream and lemon. I used 4 balls of the cream and only a few meters of the yellow. It’s approximately 90cm x 90cm. After I finished the square I single crochet around the border in the same cream. This gave it a really nice edge and allowed for an even yellow border. You could continue the yellow border for a few more rounds, but love the current effect so I finished it after only one round. This took about 20 hours to make.